
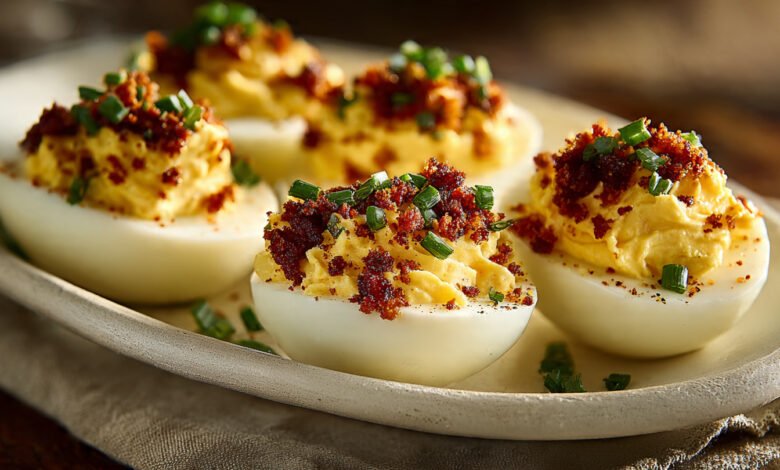
Bacon Deviled Eggs: Crispy, Smoky & Irresistibly Creamy (Best-Ever Recipe)
There are certain flavor pairings that just feel destined to be together, and the combination of a creamy, tangy deviled egg with the salty, smoky crunch of real bacon is one of the best. It’s a textural masterpiece that has earned its place as a staple of the American appetizer table.
This recipe for Bacon Deviled Eggs is the one you’ll find yourself making on repeat they’re the first thing to disappear at Easter brunch, the surprise hit of the Super Bowl spread, and the empty tray on the picnic table at every July Fourth cookout. If you’re looking for a crowd-pleasing classic that brings a little extra savory crunch to the party, you’ve come to the right place.
Table of Contents
Why This Recipe Is the Best Version Out There
Most bacon deviled egg recipes make one critical mistake: they use too little bacon, and they add it as a barely-there afterthought on top. My opinion is the complete opposite — bacon goes INSIDE the filling AND on top. You get smoky depth in every single bite from the filling, plus a crispy, crunchy textural payoff the moment you take that first bite. Here’s what else sets this recipe apart:
- Smoked bacon instead of regular bacon adds a deeper, wood-fired flavor dimension.
- Dijon mustard AND yellow mustard together give the filling a complex tanginess that one mustard alone cannot deliver.
- A touch of sour cream alongside mayonnaise gives the filling a lighter, silkier, more elevated texture than mayo alone.
- Fresh dill AND chives together bring a garden-bright herbal finish that cuts through the richness of the bacon and egg .
- Smoked paprika in the garnish ties the smoky bacon flavor through the entire presentation visually and on the palate.
Ingredients and Instructions

Bacon Deviled Eggs
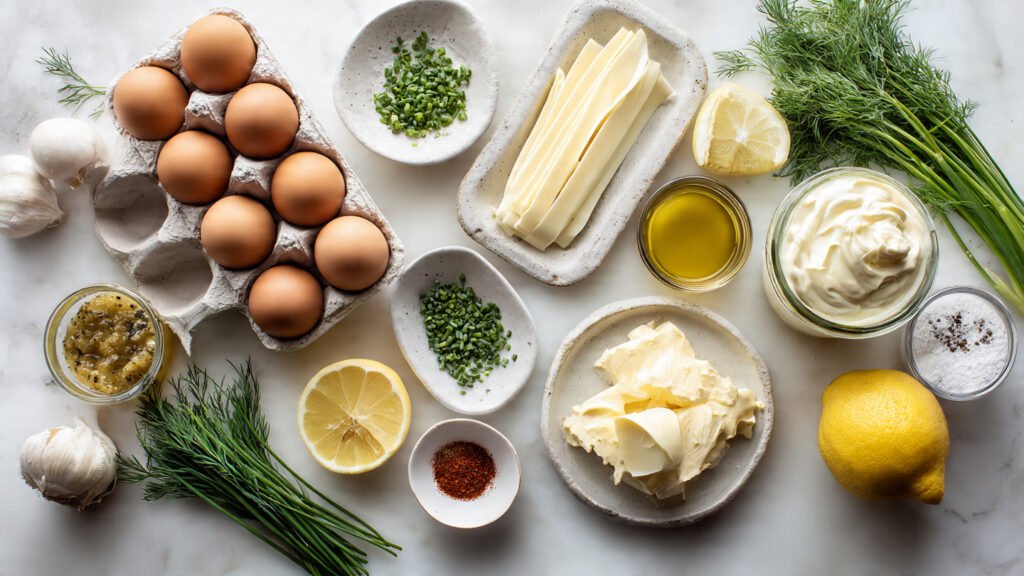
Ingredients
For the Eggs:
- 12 large eggs room temperature
- 1 tsp white vinegar added to boiling water for easier peeling
For the Bacon:
- 6 strips thick-cut smoked bacon
- ½ tsp freshly cracked black pepper to season while cooking
For the Filling:
- ⅓ cup full-fat mayonnaise Hellmann’s or Duke’s
- 3 tbsp full-fat sour cream Daisy is the gold standard in American kitchens
- 1½ tsp Dijon mustard Grey Poupon
- 1 tsp yellow mustard
- 1 tbsp sweet pickle relish Mt. Olive or Vlasic
- 1 tsp fresh lemon juice
- ½ tsp smoked paprika plus more for garnish
- ¼ tsp garlic powder
- ¼ tsp onion powder
- ½ tsp fine kosher salt plus more to taste
- ¼ tsp freshly cracked black pepper
- Dash of hot sauce Frank’s RedHot or Tabasco
For Garnish:
- Reserved crispy bacon crumbles the hero — don’t skimp
- 2 tbsp fresh chives finely
- 2 tsp fresh dill finely chopped
- Smoked paprika for dusting
- Flaky sea salt Maldon — finishing touch
- Optional: ¼ cup finely grated sharp cheddar cheese folded into the filling
- Optional: 1 cup thinly sliced shallots fried crispy in olive oil for an elevated topping
Instructions
Step 1 — Cook the Bacon Right (This Step Makes or Breaks the Recipe)
- Before anything else — before you even touch an egg — cook your bacon. Here’s why: bacon needs to cool and dry completely before you crumble it, and freshly cooked bacon left to steam in a covered pan gets limp and soggy. Limp bacon in a deviled egg is a crime I will not allow in my kitchen.
Two proven methods:
- Stovetop Method: Lay 6 strips of thick-cut smoked bacon flat in a cold cast iron skillet. Turn the heat to medium — not high. Starting in a cold pan renders the fat slowly and evenly, producing bacon that is uniformly crispy from edge to edge without burning. Cook 4 to 5 minutes per side, turning once, until deep golden brown and fully crisped. Transfer to a paper towel-lined plate to drain. Season with a crack of black pepper.
- Oven Method (Best for Large Batches): Place bacon strips on a wire rack set over a foil-lined baking sheet. Bake at 400°F for 18 to 20 minutes until crispy. The wire rack allows hot air to circulate completely around the bacon, producing the flattest, crispiest strips possible with zero effort. This is my go-to method when I’m cooking for a crowd.
- Once cooled completely, chop the bacon into fine bits. Reserve half for inside the filling and half for topping.
Step 2 — Perfect Hard-Boiled Eggs
- Place 12 large eggs in a single layer in a medium saucepan. Cover with cold water by at least 1 inch. Add 1 tsp of white vinegar to the water. Bring to a full rolling boil over high heat, then immediately reduce to the lowest possible simmer and cook for 14 minutes.
- While the eggs cook, prepare a large bowl filled generously with cold water and ice. When the 14 minutes are up, transfer the eggs immediately to the ice bath using a slotted spoon and let them sit for a full 10 to 12 minutes. This cold shock stops the cooking dead and prevents that notorious gray-green ring around the yolk.
- Peel the eggs under a thin stream of cool running water, working from the wide end of the egg where the air pocket is that’s always the easiest starting point.
Step 3 — Build the Filling
- Slice each peeled egg in half lengthwise with one clean, confident cut. Use a small spoon to pop the yolks out cleanly into your mixing bowl. Arrange the whites neatly on your serving platter, hollow side up.
- Into the bowl with the yolks, add:
- ⅓ cup mayonnaise
- 3 tbsp sour cream
- 1½ tsp Dijon mustard
- 1 tsp yellow mustard
- 1 tbsp sweet pickle relish
- 1 tsp fresh lemon juice
- ½ tsp smoked paprika
- ¼ tsp garlic powder
- ¼ tsp onion powder
- Salt, pepper, and a dash of hot sauce
- First, mash the yolks thoroughly with a fork until they resemble fine, dry crumbs with no large lumps remaining. Then transfer everything to a food processor and blend on high for 30 to 45 seconds until the filling is completely smooth, silky, and light. If you don’t own a food processor, a hand mixer on medium speed for 60 seconds works beautifully.
- Fold in half of your reserved bacon crumbles by hand with a rubber spatula you want chunky bacon pieces throughout the filling, not blended into invisibility. If using cheddar cheese, fold that in at this stage too.
- Taste critically. Adjust salt, mustard, or lemon juice. The filling should taste bold, smoky, tangy, and rich it should make you want to eat it straight off a spoon. That’s how you know it’s ready.
Step 4 — Fill, Garnish, and Serve Like a Pro
- Transfer your filling to a piping bag fitted with a large open-star tip for elegant, professional presentation. Pipe generously into each egg white half — be bold, be generous. The mound of filling should be full and proud, standing well above the rim of the white.
- Now build your garnish with intention and purpose:
- Scatter the reserved crispy bacon crumbles generously over the top this is the star of the show, don’t be shy
- Dust each egg with a light cloud of smoked paprika for color and that final hit of smokiness
- Scatter fresh chives and dill across the platter for color and herbal brightness
- Finish with a tiny pinch of flaky Maldon sea salt on each egg to make every element pop
- If you made crispy shallots, scatter those over the top as a final restaurant-grade flourish
- Serve immediately at room temperature for the best flavor cold straight from the refrigerator mutes the filling’s depth.

Equipment You’ll Need
- Medium saucepan
- Large bowl with ice water
- Cast iron skillet or nonstick pan (for bacon) — or a wire rack over a sheet pan for oven-baked bacon
- Paper towels
- Sharp paring knife
- Mixing bowl
- Fork or potato masher
- Food processor or hand mixer (for ultra-smooth filling)
- Piping bag with large star tip, or a gallon zip-top bag with corner snipped
- Deviled egg platter or large serving tray
Make-Ahead & Storage Tips
Bacon deviled eggs are ideal for prepping in advance a lifesaver for big holiday gatherings and parties:
- Boil and peel eggs up to 3 days ahead store in a covered bowl of cold water in the refrigerator.
- Cook the bacon up to 3 days ahead store in an airtight container at room temperature for maximum crispness, or refrigerate and re-crisp in a dry skillet for 60 seconds before serving.
- Prepare the filling (without bacon folded in) up to 2 days ahead store in an airtight container with plastic wrap pressed directly onto the surface.
- Fold in bacon and pipe no more than 2 hours before serving this keeps the bacon crispy and the presentation perfect.
- Assembled deviled eggs keep in the refrigerator for up to 2 days but bacon will soften over time.
Chef’s Variations
Five tested, approved, crowd-wrecking twists on the base recipe:
- Bacon Cheddar Deviled Eggs: Fold ¼ cup finely grated sharp cheddar directly into the filling and top each egg with a tiny extra pinch of cheese alongside the bacon crumbles a flavor combination as American as it gets
- Jalapeño Bacon Deviled Eggs: Fold 2 tbsp finely diced pickled jalapeños into the filling and top with a fresh jalapeño slice alongside the bacon spicy, smoky, and completely irresistible
- Bacon Ranch Deviled Eggs: Stir 1 tbsp of Hidden Valley dry ranch seasoning into the filling and garnish with extra fresh dill and green onion tops a guaranteed game day smash hit
- Sour Cream Bacon Deviled Eggs: Replace the mayo entirely with ½ cup full-fat sour cream for a lighter, tangier, slightly more European-style filling that still pairs perfectly with the smoky bacon
- Bacon & Crispy Shallot Deviled Eggs: Fry 1 cup of thinly sliced shallots in ¾ cup olive oil over medium heat until golden and crispy. Top each egg with both bacon crumbles AND crispy shallots for a textural experience that belongs in a fine dining restaurant
Recipe FAQs
How do I keep the bacon crispy on deviled eggs and prevent it from getting soggy?
The biggest enemy of crispy bacon is moisture and steam. Make sure your bacon is completely cooled and drained on paper towels before crumbling it. Add it to the eggs right before serving — not hours in advance. If you’re assembling the eggs ahead of time, store the bacon separately and sprinkle it on at the last minute.
Should I mix the bacon into the filling or just use it as a topping?
Both, put half the bacon crumbles inside the filling so every bite has smoky depth, and reserve the other half for the top so there’s visible, crunchy texture with the first bite. Using it only as a topping is a missed opportunity.
What’s the best type of bacon to use?
Thick-cut smoked bacon is the clear winner for this recipe. It crumbles into hearty, substantial bits rather than disappearing into dust. Brands like Wright Brand Bacon, Oscar Mayer Thick Cut, and Trader Joe’s Uncured Applewood Smoked Bacon are all widely available and excellent. Applewood smoked adds a slightly sweeter flavor that pairs beautifully with the tangy filling.
How many deviled eggs per person should I plan for a party?
Plan for 3 to 4 halves per person as an appetizer. For a crowd where deviled eggs are the featured appetizer (think Easter or a bridal shower), go up to 5 to 6 halves per person. They always go faster than you think — every experienced host has a “I didn’t make enough deviled eggs” story.
Can I use turkey bacon or a non-pork substitute?
Absolutely, turkey bacon from brands like Butterball or Jennie-O works well. It won’t render as much fat or crisp as dramatically as pork bacon, but cooking it in a very thin layer of olive oil in a hot skillet will get you close to the same crunch. For a vegetarian option, use store-bought bacon bits made from soy (Bac’n Pieces by Betty Crocker are widely available) — surprisingly effective in this role.