
The Ultimate Classic Chocolate Chip Cookies Guide: Perfect Homemade Treats Every Time
Table of Contents
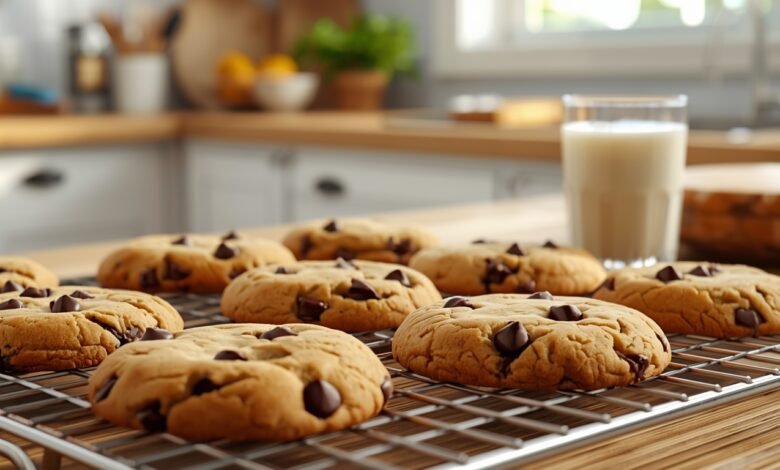
Baking classic chocolate chip cookies brings comfort to any kitchen. Whether you’re new to baking or looking to improve your technique, this Classic Chocolate Chip Cookies Guide covers everything you need to create cookies with crispy edges and soft, chewy centers. You’ll learn the science behind perfect cookies, common mistakes to avoid, and how to customize your batch.
The beauty of chocolate chip cookies lies in their simplicity. However, small changes in ingredients or technique can dramatically affect your results. Let’s break down exactly what you need to know.
What Makes a Classic Chocolate Chip Cookie Perfect?
A perfect chocolate chip cookie balances three key elements: texture, flavor, and appearance. The ideal cookie features golden-brown edges with a slightly undercooked center that firms up as it cools. According to King Arthur Baking, the perfect cookie should spread slightly during baking but maintain its shape.
The flavor profile combines buttery richness with deep caramel notes from brown sugar. Chocolate chips should be distributed evenly, and a pinch of salt enhances sweetness. Most importantly, the cookie should deliver that satisfying contrast between crispy edges and a soft middle.
Key Characteristics to Look For
Texture balance determines cookie quality. You want edges that hold their shape while centers remain tender. This happens when you nail the ratio of butter to flour and don’t overbake.
Color matters too. A properly baked cookie shows light golden edges with paler centers. Dark brown usually means you’ve gone too far.
Pro Tip: The Chill Factor
Chilling your dough for at least 30 minutes prevents excessive spreading. Cold butter takes longer to melt, giving cookies time to set their structure. America’s Test Kitchen research shows that chilled dough produces thicker, chewier cookies with more concentrated flavor.
What Ingredients Do You Need for Classic Chocolate Chip Cookies?
You’ll need all-purpose flour, butter, white sugar, brown sugar, eggs, vanilla extract, baking soda, salt, and chocolate chips. Each ingredient plays a specific role in cookie chemistry. Using room temperature butter and eggs helps everything blend smoothly, creating even texture throughout.
Quality matters here. Real butter beats margarine every time, and pure vanilla extract outperforms imitation versions. For chocolate, semi-sweet chips remain the classic choice, though you can experiment with chunks or different cocoa percentages.
| Ingredient | Purpose | Key Consideration |
|---|---|---|
| Butter | Adds flavor and richness | Use unsalted to control salt levels |
| Brown Sugar | Creates chewiness and caramel flavor | Dark brown = stronger molasses taste |
| White Sugar | Promotes spreading and crispiness | Granulated works best |
| Eggs | Binds ingredients and adds moisture | Room temperature mixes better |
| Flour | Provides structure | Don’t pack when measuring |
| Baking Soda | Creates lift and spread | Too much makes cookies taste soapy |
| Chocolate Chips | Star ingredient | 2 cups is standard |
Why Butter Temperature Matters
Room temperature butter (around 65-67°F) creams properly with sugar, incorporating air that creates lighter texture. The Food Lab by J. Kenji López-Alt explains that melted butter produces denser, chewier cookies, while cold butter makes thick, cakey ones.
Brown Sugar vs. White Sugar Ratio
The split between brown and white sugar affects final texture. More brown sugar means chewier cookies with stronger molasses flavor. Equal parts of each delivers the classic balance most people recognize.
How Do You Mix Cookie Dough Properly?
Start by creaming butter and sugars together until light and fluffy (about 2-3 minutes with an electric mixer). This step incorporates air, which helps cookies rise. Add eggs one at a time, then vanilla. Finally, mix in dry ingredients just until combined—overmixing develops gluten, making cookies tough.
The order matters because it affects how ingredients bond. Creaming first creates tiny air pockets that expand during baking. Adding flour last and mixing gently prevents gluten overdevelopment.
The Mixing Timeline
Beat butter and sugars for 2-3 minutes until pale yellow. Scrape bowl sides down halfway through. Add eggs one at a time, beating for 30 seconds after each. Mix in vanilla extract quickly.
In a separate bowl, whisk together flour, baking soda, and salt. Add dry ingredients to wet ingredients in two batches. Mix on low speed just until no flour streaks remain. Fold in chocolate chips by hand using a spatula.
Common Mixing Mistakes
Overmixing after adding flour creates tough cookies. Mix only until you can’t see dry flour. Some bakers stop when a few flour streaks remain and finish by hand.
Not scraping the bowl leaves pockets of unmixed ingredients. Stop mixer twice during creaming to scrape sides and bottom.
What’s the Best Baking Temperature and Time?
Bake at 350°F (175°C) for 10-12 minutes until edges turn golden but centers look slightly underdone. Cookies continue cooking on the hot pan after removal, so pulling them early prevents overbaking. Sally’s Baking Addiction recommends rotating pans halfway through for even browning.
Your oven’s actual temperature might differ from the dial setting. An oven thermometer eliminates guesswork. Position your rack in the center for best heat circulation.
Understanding Visual Cues
Watch for edges that look set and lightly browned. Centers should appear puffy and slightly wet. Small cracks may form on top, but centers shouldn’t look dry.
Remove cookies when they still seem soft in the middle. They’ll firm up during the 5-minute cooling period on the baking sheet.
Important Consideration: Pan Selection
Light-colored aluminum pans work best because they reflect heat evenly. Dark pans absorb more heat, browning bottoms too quickly. Line pans with parchment paper for easy removal and cleanup.
Space cookies 2 inches apart. They spread during baking, and crowding causes uneven cooking.
Why Are My Cookies Flat or Spreading Too Much?
Cookies spread excessively when butter is too warm, dough isn’t chilled, or you’ve used too little flour. Melted butter can’t hold structure, causing cookies to puddle. Similarly, warm dough spreads before setting. Bon Appétit’s test kitchen found that 30 minutes of chilling dramatically reduces spread.
Measure flour correctly by spooning it into measuring cups and leveling off. Scooping directly from the bag compacts flour, giving you less than needed. Too little flour means nothing holds cookies together.
Quick Fixes for Flat Cookies
Add 2-4 tablespoons more flour to your next batch. Chill dough for at least 30 minutes before baking. Verify your baking soda is fresh old leavening agents don’t work properly.
Check that your butter was properly softened, not melted. If it feels oily or looks shiny, it’s too warm.
Pro Tip: The Fridge Test
Press your finger into dough before baking. If it leaves a deep impression easily, chill longer. Properly chilled dough resists pressure slightly.
Recipe Related To Classic Chocolate Chip Cookies
- Classic Chocolate Chip Cookies With Crispy Edges
- Classic Chocolate Chip Oatmeal Cookies
- Classic Chocolate Chip Cookies Vegan No Eggs
- Classic Chocolate Chip Cookies with Vanilla Bean Paste
How Do You Store Chocolate Chip Cookies to Keep Them Fresh?
Store cookies in an airtight container at room temperature for up to 5 days. Add a slice of bread to the container—it releases moisture that keeps cookies soft. For longer storage, freeze baked cookies up to 3 months or freeze dough balls for fresh-baked cookies anytime.
Cookie dough freezes beautifully. Scoop dough into balls, freeze on a baking sheet until solid, then transfer to freezer bags. Bake directly from frozen, adding 1-2 minutes to baking time.
Freezing Cookie Dough
Shape dough into balls and place on a parchment-lined baking sheet. Freeze until solid (about 2 hours). Transfer frozen dough balls to a freezer-safe bag, removing as much air as possible.
Label with the date and baking instructions. Frozen dough stays good for 3 months. Bake straight from the freezer without thawing.
Reviving Stale Cookies
Microwave cookies for 8-10 seconds to soften them. Alternatively, place them in a 300°F oven for 3-4 minutes. The heat refreshes texture temporarily.
Can You Customize Classic Chocolate Chip Cookies?
Absolutely! Add nuts, swap chocolate varieties, or include mix-ins like toffee bits or dried fruit. Popular variations include adding 1 cup of chopped walnuts or pecans, using dark chocolate chunks instead of chips, or incorporating a teaspoon of espresso powder to enhance chocolate flavor.
Keep total mix-ins around 2-2.5 cups to maintain proper dough consistency. Too many additions make cookies fall apart. Balance different textures—pair crunchy nuts with smooth chocolate.
Popular Flavor Variations
Replace half the chocolate chips with white chocolate or butterscotch chips. Add 1 teaspoon of cinnamon for warmth. Mix in 1/2 cup of shredded coconut for tropical notes.
Sprinkle sea salt flakes on top before baking for sweet-salty contrast. This simple addition elevates basic cookies to gourmet level.
Important Consideration: Sizing
Use a cookie scoop for uniform size. Standard 2-tablespoon scoops produce cookies about 3 inches across. Larger cookies need longer baking time, while smaller ones finish faster.
Uniform sizing ensures even baking. Mixed sizes mean some cookies burn while others underbake.
FAQ
Why did my cookies turn out cakey instead of chewy?
You likely used too much flour or not enough butter. Also, overmixing develops gluten, creating cake-like texture. Measure flour by spooning into cups rather than scooping directly.
Can I use salted butter instead of unsalted?
Yes, but reduce added salt by half. Salted butter contains varying salt amounts by brand, making it harder to control flavor precisely.
How do I know when cookies are done?
Edges should look golden and set while centers appear slightly underdone and puffy. They’ll continue cooking on the pan after removal from the oven.
Why do my cookies burn on the bottom?
Your oven rack is too low, or you’re using dark-colored pans that absorb too much heat. Move the rack to the center position and switch to light aluminum pans.
Can I substitute ingredients for dietary restrictions?
Yes, with adjustments. Use gluten-free flour blends (add 1/4 teaspoon xanthan gum if not included). Replace butter with vegan alternatives, though texture may differ slightly.