

Teriyaki Chicken Rice Bowl – Ready in 30 Minutes
Table of Contents
Have you ever had one of those evenings where takeout sounds great until you remember the delivery fees, the wait time, and the fact that you could’ve made something better yourself in the same amount of time? Well, this Teriyaki Chicken Rice Bowl is exactly the answer to that problem.
It’s the kind of bowl that looks impressive, tastes like it came from a real restaurant, and comes together in about 30 minutes using ingredients you probably already have sitting in your pantry right now.
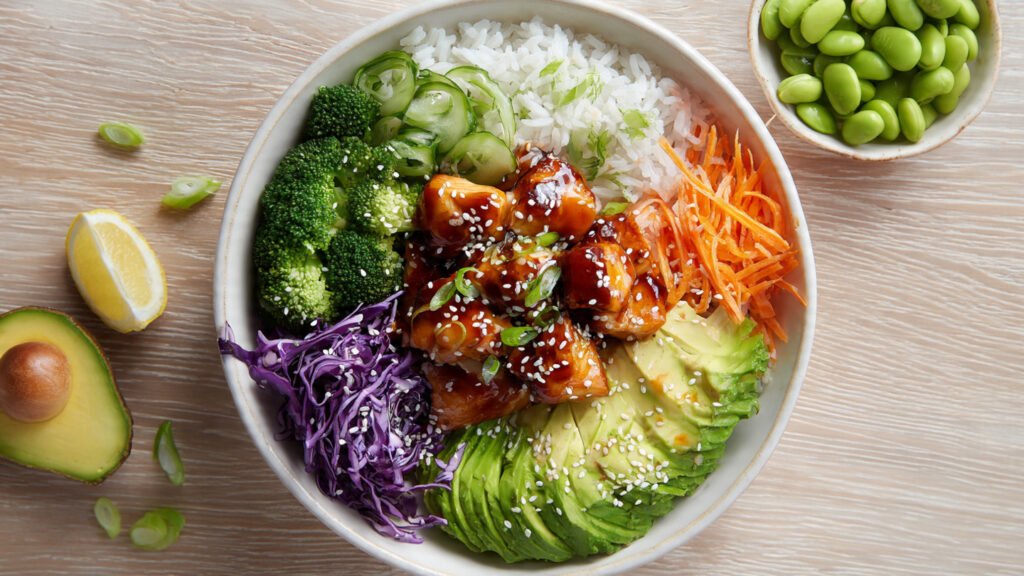
Juicy, golden pan-seared chicken, a thick and glossy homemade teriyaki sauce, fluffy jasmine rice, and a pile of fresh colorful vegetables — all stacked into one bowl that’s going to make everyone at your table very, very happy. So let’s get into it right now.
What Sets This Bowl Apart
First and foremost, the sauce here is completely homemade — and that makes all the difference. Store-bought teriyaki sauces are often loaded with high-fructose corn syrup, artificial flavor enhancers, and a saltiness that overpowers everything else. In this recipe, you’re whisking together real soy sauce, honey, brown sugar, rice vinegar, garlic, and fresh ginger into a sauce that’s perfectly balanced — sweet, savory, tangy, and deeply aromatic all at once.
Beyond the sauce, the layering of the bowl is what makes each bite so satisfying. The fluffy rice absorbs the extra glaze that drips down from the chicken. The crisp vegetables add freshness and crunch. And the chicken itself — seared until golden and then coated in that sticky, lacquered glaze — brings everything together. It’s not just dinner. It’s a fully built, nutritionally balanced bowl that keeps you full and satisfied for hours.
Ingredients
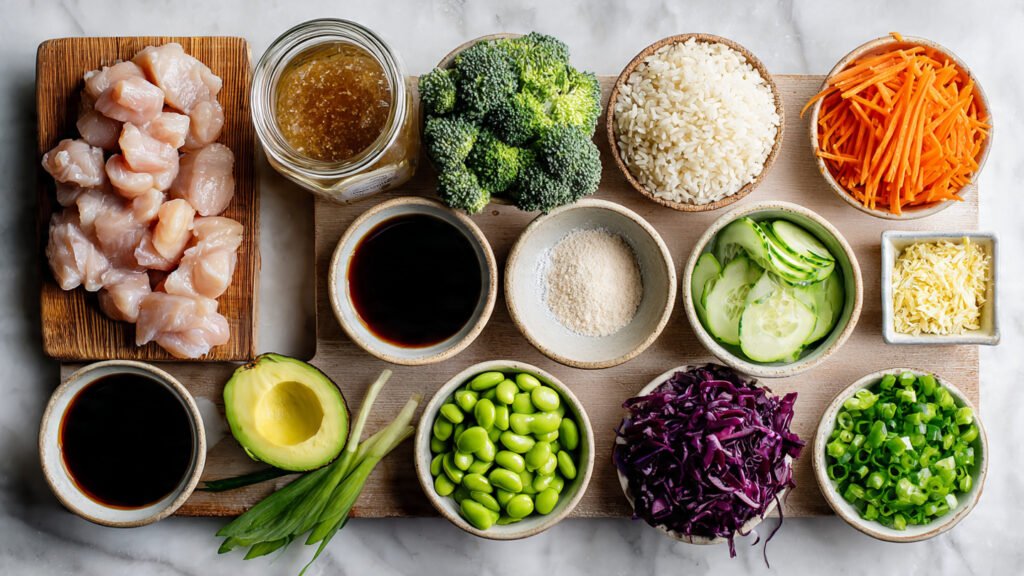
For the Teriyaki Chicken:
- 1½ lbs boneless, skinless chicken thighs (or chicken breasts), cut into 1-inch cubes
- 2 tablespoons cornstarch (for coating — creates a lightly crispy crust)
- ½ teaspoon salt
- ¼ teaspoon black pepper
- 1 tablespoon avocado oil or vegetable oil
For the Homemade Teriyaki Sauce:
- ¼ cup low-sodium soy sauce
- 3 tablespoons honey
- 2 tablespoons light brown sugar
- 2 tablespoons rice vinegar (or apple cider vinegar)
- 2 cloves garlic, minced
- 1 teaspoon fresh ginger, grated
- 1 teaspoon sesame oil
- 1 tablespoon cornstarch + 2 tablespoons cold water (slurry to thicken)
- ¼ teaspoon red pepper flakes (optional — for a gentle kick)
For the Bowl:
- 2 cups cooked jasmine rice (white or brown rice, your choice)
- 1½ cups broccoli florets, steamed
- 1 medium avocado, sliced
- ½ cup shredded carrots
- ½ cup shredded purple cabbage
- ½ cup frozen edamame, thawed
- ½ cup cucumber, thinly sliced
For Garnish:
- 1 teaspoon toasted sesame seeds
- 2 green onions (scallions), thinly sliced
- Optional: drizzle of sriracha or a dollop of spicy mayo
Step-by-Step Instructions
Step 1 – Cook Your Rice First
To start, get your rice going before anything else. Whether you’re using a rice cooker, Instant Pot, or stovetop pot, jasmine rice takes about 15 to 18 minutes, so getting it going first means everything else finishes right on time. While the rice is cooking, you’ll prepare the sauce and cook the chicken simultaneously — that kind of smart, parallel cooking is exactly how this meal stays under 30 minutes.
Step 2 – Whisk the Teriyaki Sauce
Next, combine the soy sauce, honey, brown sugar, rice vinegar, garlic, ginger, sesame oil, and red pepper flakes in a medium mixing bowl. Whisk everything together until the sugar is fully dissolved and there are no granules left. Then, in a separate small bowl, stir the cornstarch and cold water together until completely smooth. Add that slurry directly into the sauce and whisk once more. Set the sauce aside — it’s ready to go the moment the chicken is cooked through.
Step 3 – Coat and Sear the Chicken
Now, pat the chicken cubes completely dry with paper towels — this is absolutely essential for getting a proper sear instead of a steam. Season with salt and pepper, then toss the pieces in 2 tablespoons of cornstarch until each piece is lightly coated on all sides. Heat the avocado oil in a large non-stick skillet over medium-high heat until it’s visibly shimmering. Add the chicken in a single layer, making sure not to overcrowd the pan. Cook without touching for 3 full minutes, then flip and cook for another 2 to 3 minutes. The exterior should be a deep golden brown and the internal temperature should reach 165°F.
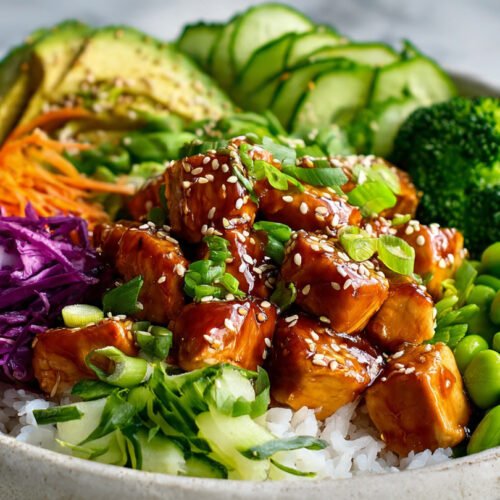
Step 4 – Glaze the Chicken
Once the chicken is cooked, pour the teriyaki sauce directly into the skillet over the chicken. It will immediately begin to bubble and sizzle. Stir and toss the chicken in the sauce over medium heat for 2 to 3 minutes, until the sauce thickens into a glossy, sticky glaze that completely coats every piece. If the sauce thickens too fast, add a tablespoon of water and continue tossing. Remove from heat and let it rest for 2 minutes — that resting time lets the glaze set beautifully.
Step 5 – Steam the Veggies
While the chicken rests, quickly steam or microwave the broccoli florets. Place them in a microwave-safe dish with 2 tablespoons of water, cover with a damp paper towel, and microwave on high for 2 to 3 minutes until bright green and just tender. Alternatively, blanch them in boiling water for 2 minutes and then drain. Season lightly with salt. Meanwhile, slice the avocado, thinly slice the cucumber, and shred the purple cabbage if you haven’t already done so.
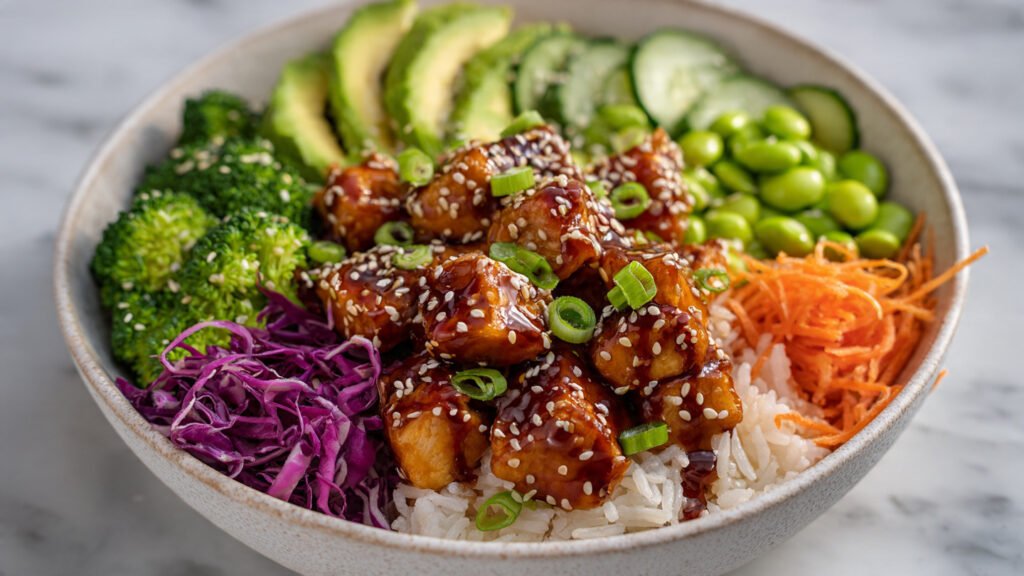
Step 6 – Build the Bowl
Here’s the fun part — assembly. Scoop a generous base of fluffy jasmine rice into each bowl. Arrange the teriyaki chicken on top, then artfully place the steamed broccoli, sliced avocado, shredded carrots, purple cabbage, edamame, and cucumber around the sides of the bowl. Spoon any remaining teriyaki glaze from the skillet over the chicken and rice. Finally, finish each bowl with a sprinkle of toasted sesame seeds, sliced green onions, and a drizzle of sriracha or spicy mayo if you like things a little hot.
Chef Tips for a Restaurant-Quality Bowl
- Avocado adds magic: Sliced avocado adds a creamy, buttery richness that balances the sweet-savory punch of the teriyaki glaze beautifully. Add it cold, right before serving, so it stays fresh and green.
- Score your chicken thighs: If using whole thighs instead of cubes, make a few shallow cuts across the surface before seasoning. This helps the sauce penetrate deeper and speeds up cooking time.
- Build your bowl cold-to-hot: Start with the warm rice, then add the hot glazed chicken, and finally add the cold fresh vegetables. This contrast of temperatures in the same bowl is what makes it feel truly restaurant-level.
- Make extra sauce: Double the teriyaki sauce recipe and store the extra in a sealed jar in the fridge for up to two weeks. Use it on roasted vegetables, salads, or any protein throughout the week.
- Spicy mayo in 30 seconds: Mix 2 tablespoons of mayonnaise with 1 teaspoon of sriracha and a squeeze of lime. Drizzle it over the assembled bowl for a creamy, spicy finishing touch.
Recipe FAQs
Can I use chicken breasts instead of thighs?
Absolutely — and it’s actually a great lower-fat option. Chicken breasts are leaner and higher in protein per ounce than thighs. Just cut them into even 1-inch cubes so they cook quickly and evenly, and pull them off the heat the moment they hit 165°F internally to avoid dryness.
What rice works best for this bowl?
Jasmine rice is the top choice here because of its slightly floral aroma and fluffy texture. However, brown rice adds more fiber and keeps you fuller longer, while cauliflower rice is a great low-carb option that cuts the calories significantly.
Can this bowl be made gluten-free?
Yes, easily! Simply swap the regular soy sauce for tamari or coconut aminos — both are gluten-free and widely available at US grocery stores including Whole Foods, Walmart, and Target. Everything else in this recipe is naturally gluten-free.
Can I prep this bowl ahead of time?
Definitely. Cook and store the chicken with sauce, rice, and vegetables separately in airtight containers in the refrigerator for up to 4 days. Keep the avocado and fresh vegetables separate and add them right before eating to prevent browning and sogginess.
How do I reheat the chicken without drying it out?
Add a tablespoon of water to the container, cover loosely, and microwave for 90 seconds to 2 minutes, stirring halfway through. Alternatively, reheat in a skillet over medium heat with a splash of water for about 3 minutes — this keeps the chicken moist and the glaze glossy.
Can I marinate the chicken overnight?
Absolutely, and it’s highly recommended when you have the time. Marinate the raw chicken in half the teriyaki sauce for at least 30 minutes or overnight in the refrigerator. The flavors develop significantly deeper, and the chicken becomes even more tender and flavorful.
Is this recipe kid-friendly?
Very much so! Simply leave out the red pepper flakes and sriracha for a milder, sweeter bowl that kids tend to love. You can also serve the vegetables on the side rather than in the bowl if your kids prefer things separate.
Can I add other toppings?
Of course! Sliced mango, pickled red onion, shredded nori, microgreens, crushed peanuts, or a fried egg on top are all fantastic additions that work beautifully with the teriyaki flavor profile.
Teriyaki Chicken Rice Bowl Recipe Card
Teriyaki Chicken Rice Bowl
Ingredients
For the Teriyaki Chicken:
- 1½ lbs boneless skinless chicken thighs (or chicken breasts), cut into 1-inch cubes
- 2 tablespoons cornstarch for coating — creates a lightly crispy crust
- ½ teaspoon salt
- ¼ teaspoon black pepper
- 1 tablespoon avocado oil or vegetable oil
- For the Homemade Teriyaki Sauce:
- ¼ cup low-sodium soy sauce
- 3 tablespoons honey
- 2 tablespoons light brown sugar
- 2 tablespoons rice vinegar or apple cider vinegar
- 2 cloves garlic minced
- 1 teaspoon fresh ginger grated
- 1 teaspoon sesame oil
- 1 tablespoon cornstarch + 2 tablespoons cold water slurry to thicken
- ¼ teaspoon red pepper flakes optional — for a gentle kick
For the Bowl:
- 2 cups cooked jasmine rice white or brown rice, your choice
- 1½ cups broccoli florets steamed
- 1 medium avocado sliced
- ½ cup shredded carrots
- ½ cup shredded purple cabbage
- ½ cup frozen edamame thawed
- ½ cup cucumber thinly sliced
For Garnish:
- 1 teaspoon toasted sesame seeds
- 2 green onions scallions, thinly sliced
- Optional: drizzle of sriracha or a dollop of spicy mayo
Instructions
Step 1 – Cook Your Rice First
- To start, get your rice going before anything else. Whether you’re using a rice cooker, Instant Pot, or stovetop pot, jasmine rice takes about 15 to 18 minutes, so getting it going first means everything else finishes right on time. While the rice is cooking, you’ll prepare the sauce and cook the chicken simultaneously — that kind of smart, parallel cooking is exactly how this meal stays under 30 minutes.
Step 2 – Whisk the Teriyaki Sauce
- Next, combine the soy sauce, honey, brown sugar, rice vinegar, garlic, ginger, sesame oil, and red pepper flakes in a medium mixing bowl. Whisk everything together until the sugar is fully dissolved and there are no granules left. Then, in a separate small bowl, stir the cornstarch and cold water together until completely smooth. Add that slurry directly into the sauce and whisk once more. Set the sauce aside — it’s ready to go the moment the chicken is cooked through.
Step 3 – Coat and Sear the Chicken
- Now, pat the chicken cubes completely dry with paper towels — this is absolutely essential for getting a proper sear instead of a steam. Season with salt and pepper, then toss the pieces in 2 tablespoons of cornstarch until each piece is lightly coated on all sides. Heat the avocado oil in a large non-stick skillet over medium-high heat until it’s visibly shimmering. Add the chicken in a single layer, making sure not to overcrowd the pan. Cook without touching for 3 full minutes, then flip and cook for another 2 to 3 minutes. The exterior should be a deep golden brown and the internal temperature should reach 165°F.
Step 4 – Glaze the Chicken
- Once the chicken is cooked, pour the teriyaki sauce directly into the skillet over the chicken. It will immediately begin to bubble and sizzle. Stir and toss the chicken in the sauce over medium heat for 2 to 3 minutes, until the sauce thickens into a glossy, sticky glaze that completely coats every piece. If the sauce thickens too fast, add a tablespoon of water and continue tossing. Remove from heat and let it rest for 2 minutes — that resting time lets the glaze set beautifully.
Step 5 – Steam the Veggies
- While the chicken rests, quickly steam or microwave the broccoli florets. Place them in a microwave-safe dish with 2 tablespoons of water, cover with a damp paper towel, and microwave on high for 2 to 3 minutes until bright green and just tender. Alternatively, blanch them in boiling water for 2 minutes and then drain. Season lightly with salt. Meanwhile, slice the avocado, thinly slice the cucumber, and shred the purple cabbage if you haven’t already done so.
Step 6 – Build the Bowl
- Here’s the fun part — assembly. Scoop a generous base of fluffy jasmine rice into each bowl. Arrange the teriyaki chicken on top, then artfully place the steamed broccoli, sliced avocado, shredded carrots, purple cabbage, edamame, and cucumber around the sides of the bowl. Spoon any remaining teriyaki glaze from the skillet over the chicken and rice. Finally, finish each bowl with a sprinkle of toasted sesame seeds, sliced green onions, and a drizzle of sriracha or spicy mayo if you like things a little hot.